Warning
Cookies are used on this site to provide the best user experience. If you continue, we assume that you agree to receive cookies from this site.
CS-Cart Data feeds Add-on

The Data feeds add-on is a tool expanding the features of product export in CS-Cart webshop software.
Due to this add-on administrator of CS-Cart webstore gets the ability to do a range of things:
- to create any number of product data formats for export;
- to export files to shopping directories like Google Product Search, Shopzilla, Shopping.com, etc.;
- to define a different set of products for each file;
- specify the field configuration as you wish.
In order to set up the Data feeds add-on, follow the instructions below.
Part 1.
- Sign in your webstore's administration panel;
- Go to the Administration tab;
- Click on the Ad-dons link;
- Find the the Data feeds ad-don in the list;
- Replace its status from Disabled to Active in the select box on the right;
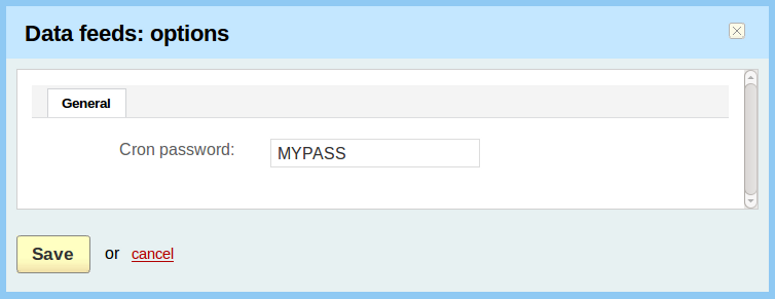
- Click on the edit link of the ad-don;
- Fill in the Cron password input field with your cron password;
- Click on the Save button.
Part 2
- Sign in your webstore's administration panel;
- Go to the Administration tab;
- Open the Data feeds link;
- Click on the Add data feed button;
- This will open a window;
- Complete the fields in it:
- Data feed name – type the data feed name.
- Filename – type the exported file name.
- Language – in the drop-down list choose the language.
- Category delimiter – specify category path delimiter for product main category (e.g. "Computers///Desktops").
- Images directory – where product images are placed. It is used in case images don't have specified path.
- Files directory - where files for downloadable products are placed. This will be used in case the path is not specified for files.
- Price decimal separator - for product prices.
- CSV delimiter – choose one variant to separate data in the feed: semicolon, comma, tab.
- Status of the data feed – tick the desired one Active or Disabled.
- Server directory – specify the directory on your server where you'd like to export the data feed to, also check if it has writable permissions.
- FTP server - the directory URL on the FTP server where the data feed should be uploaded in the format below:
- FTP username – username you want to use to access the FTP server.
- FTP password – password you want to use to access the FTP server.
- Export by cron to – you should choose one of the following options: server (means directory on a current server) or FTP (third-party FTP server), this will specify the place where you want to upload data feed to.
host[:port]/directory. For example, ftp.example.com:21/home/johndoe/feeds.
Part 3.
- Go to the Exported items tab:
- Click on the Add categories button to add necessary categories;
- Click on the Add Products button to add necessary products.
Part 4.
- Go to the Fields mapping tab;
- Here you can manage a list of fields the data feed contains;
- Each field has the following attributes:
- Pos. - stands for the field position in relation to the position of the other fields in the data feed;
- Field name – type the field name;
- Field type – insert meaning of the data in the field;
- Active – ticking this check-box can make the field available or not;
- Click on the Create button.
Comments
No posts found
